
Experiencing inaccurate readings from your analyzer can often be attributed to dirt accumulation on the sensors or golden contacts. A thorough cleaning might just be the solution you need. Here’s how you can clean the probe to ensure your device functions optimally.
Preparation:
1. Remove the Analyzer: Carefully take the analyzer out of the water. Ensure you're in a dry, clean area before you begin the cleaning process. Remove the usage cap to access the probe.
Cleaning Process:
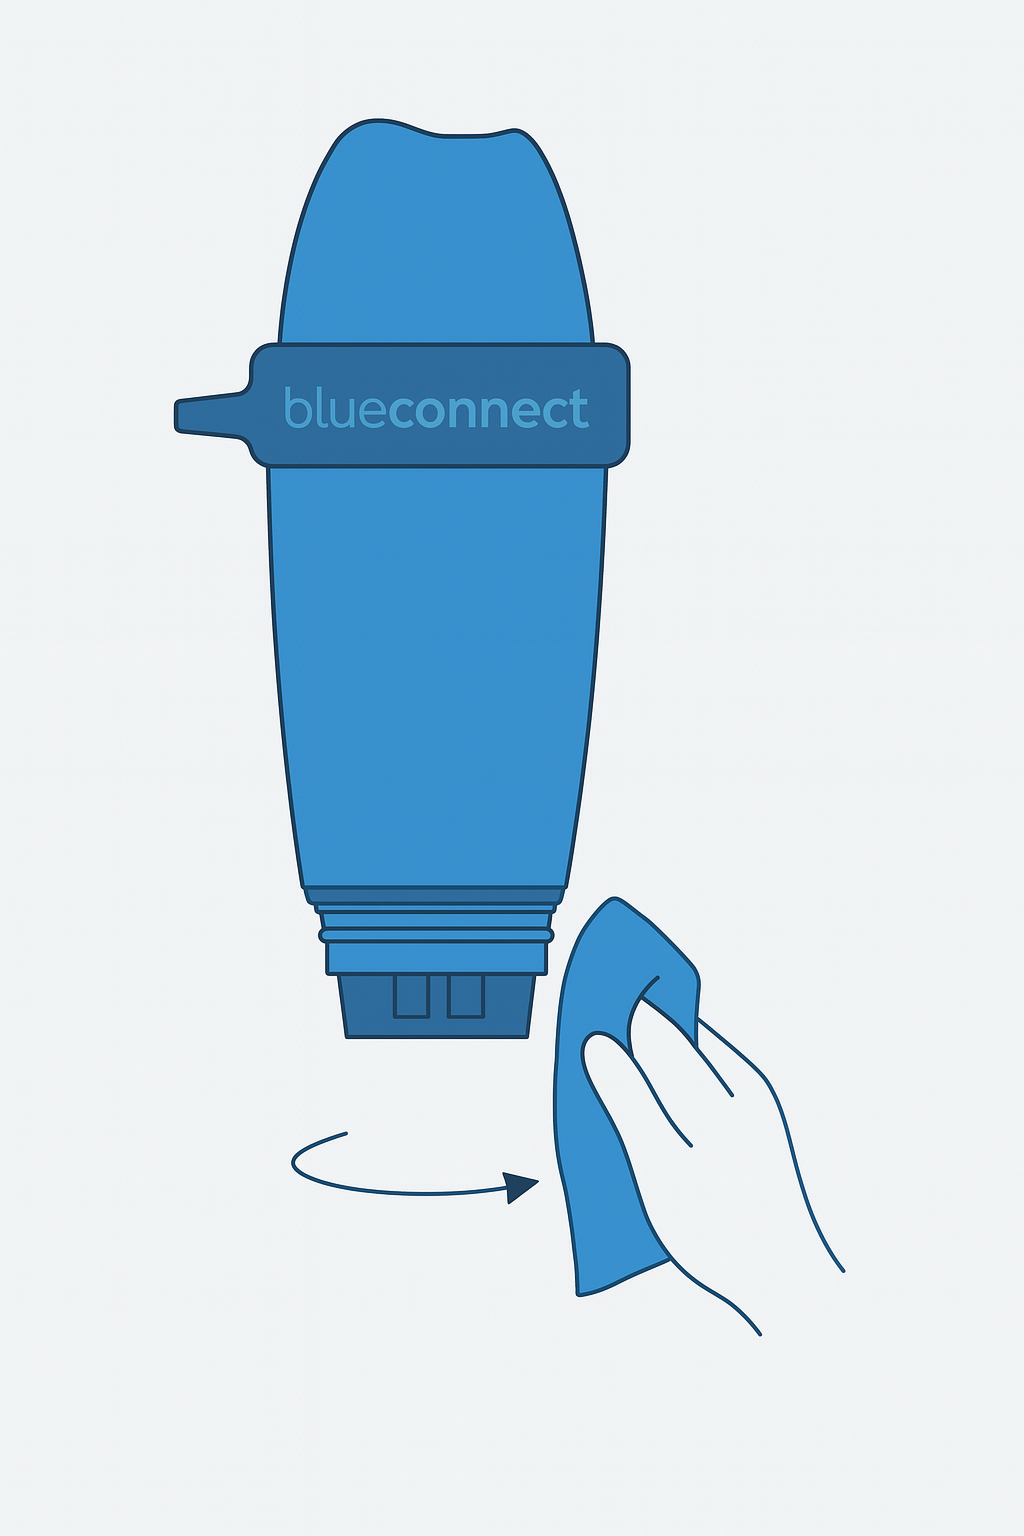
2. Dry Wipe: Use a clean, absorbent cloth to gently dry the bottom part of the analyzer, where the probe is located. Be careful not to touch the sensor directly with your fingers.
3. Loosen the Screw: If your model has a screw at the edge of the nut, use a screwdriver to unscrew it. If there are no screws, simply move on to the next step.

4. Unscrew the Nut: With the cloth, unscrew the nut. If the nut is tight, adjustable pliers may be used to loosen it. Ensure the pliers are positioned correctly to avoid damage (refer to Image A for guidance).
5. Unlock the Probe: Use a small knife, a cutter, or even your nails to gently unlock the probe from its position.

6. Remove the Probe: Carefully extract the probe, keeping the analyzer upright to prevent water from entering the device. Pay attention to the seal; it might be stuck inside and needs to be removed.
7. Wipe Off Residual Water: Clean the opening area and the inside of the hole with a cloth to remove any leftover water.
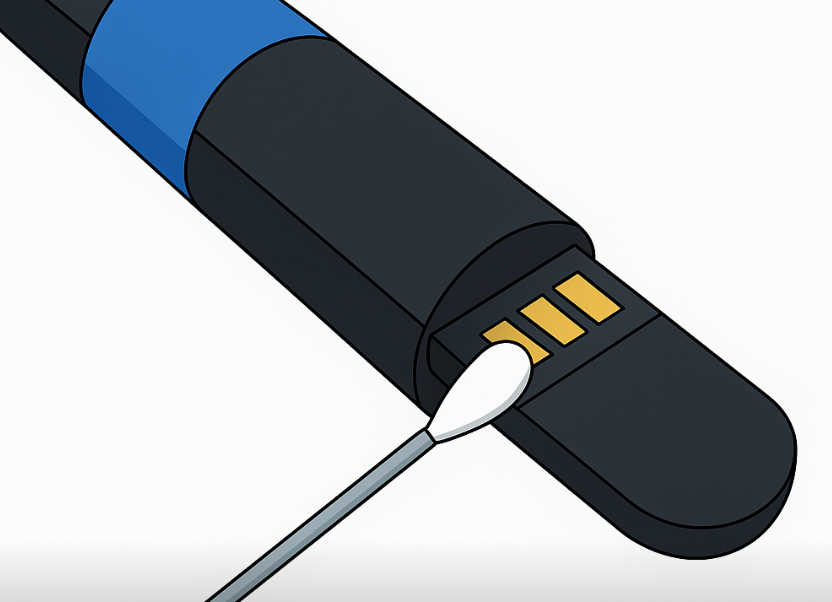
8. Clean the Contacts: Dip a cotton swab in household alcohol and clean the golden contacts atop the probe until they are shiny and completely dry.
9. Soak and Wipe the Probe: Submerge the bottom part of the probe in a soap and water solution for 5 minutes. Afterward, carefully dry it with the cloth.
10. Reattach the Seal: Ensure the seal is placed back on the probe correctly.
Reassembling:
11. Reinsert the Probe: Gently insert the probe back into the analyzer, turning it until it sits properly. You should hear three beeps within 15 seconds, indicating correct placement.
12. Secure the Nut: Screw the nut back onto the device firmly. Use the cloth for a better grip and to protect your hand.
13. Final Touches: If your model includes a screw at the nut's edge, use the screwdriver to secure it without over-tightening. No screws? Simply proceed to the next step.

14. Cap and Return: Place the usage cap back on and return the analyzer to the water.

After completing these steps, observe if the cleaning has resolved the issue with inaccurate readings.
Thank you for following these instructions. Your effort in maintaining your device ensures its accuracy and longevity.
If you haven't found the information you are looking for in our FAQ section, don't hesitate to contact our agents in the help section of the app. Remember to turn on app notifications to know when your message has been replied to.